
How do I install the professional email on my device?
The following guide shows you the whole step-by-step procedure to install a professional email (IMAP) on your device. Select from the drop-down menu the device you wish to install your email on.
For the installation of the professional email on your android mobile phone, the Gmail application will be used. Usually, this app comes pre-installed with every Android device, but if it is not installed on your mobile device you will need to download it from the Playstore.
If the app is available on your mobile device, open it and follow the steps below:
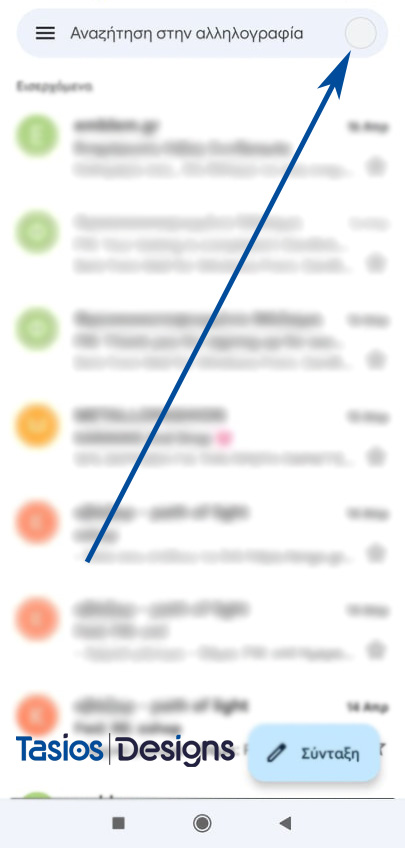
- Select the top right user image as shown in the following picture.
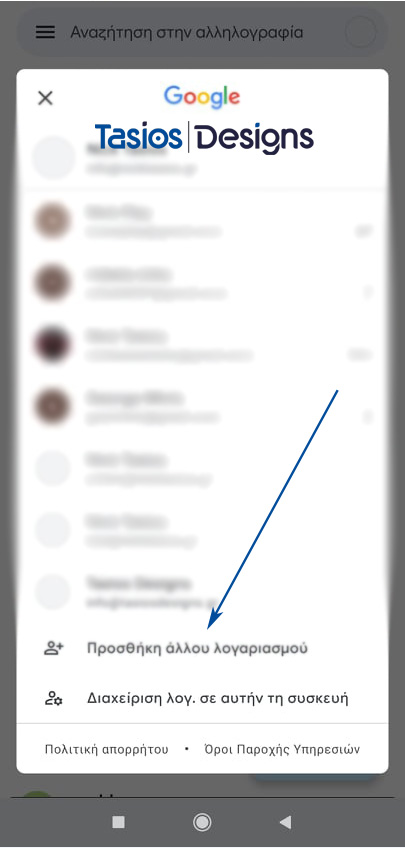
2. Select Add another account
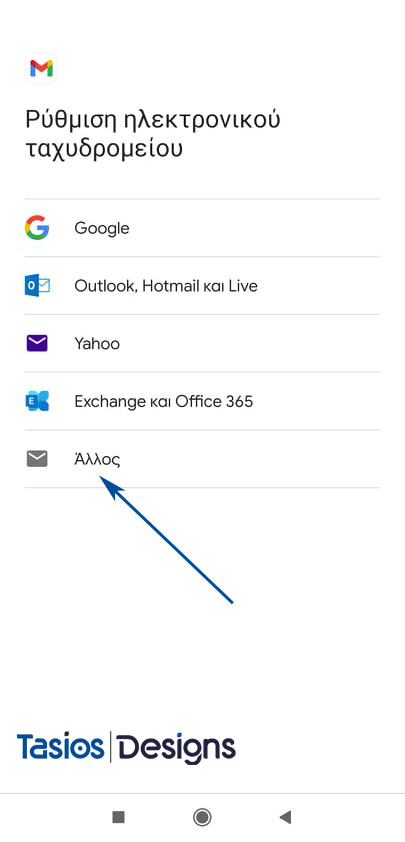
3. Then, in the options that appear, select“Other“, as shown below.
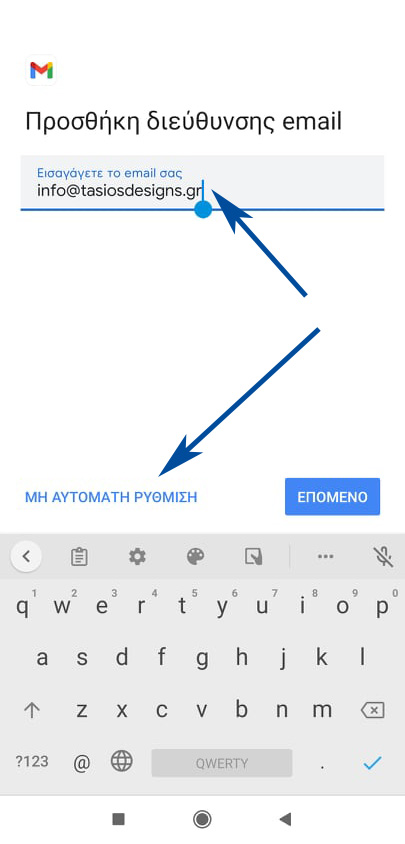
4. Enter the business email you wish to install and then select “Manual setup”.
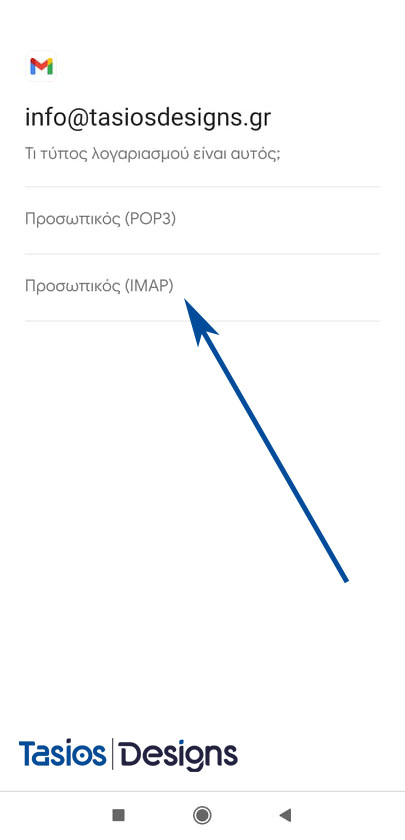
5. In the next step, select Personal (IMAP). *The IMAP option is very important as otherwise the Sent items cannot be synchronized between devices. If you want to know more about the differences between POP3 and IMAP click here.
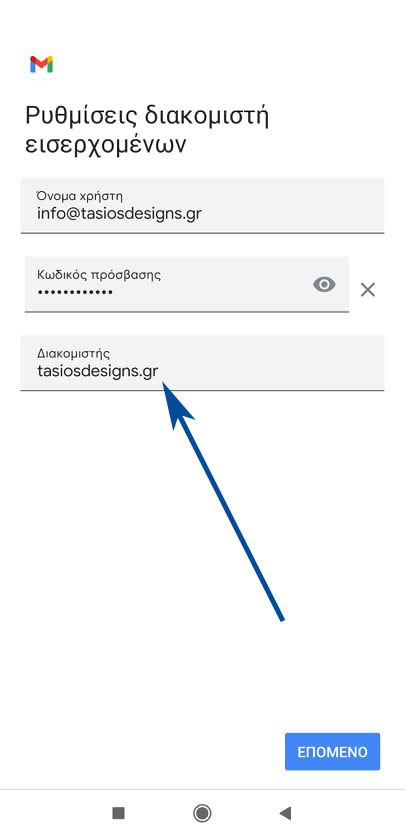
6. As a server, make sure that the Domain name that is linked to the email is entered (*The one that follows the email after the @)
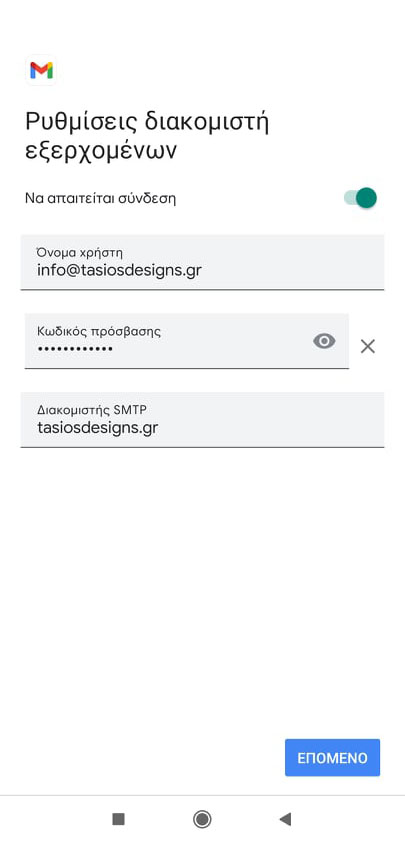
7. Follow the same procedure in Outgoing Server Settings.
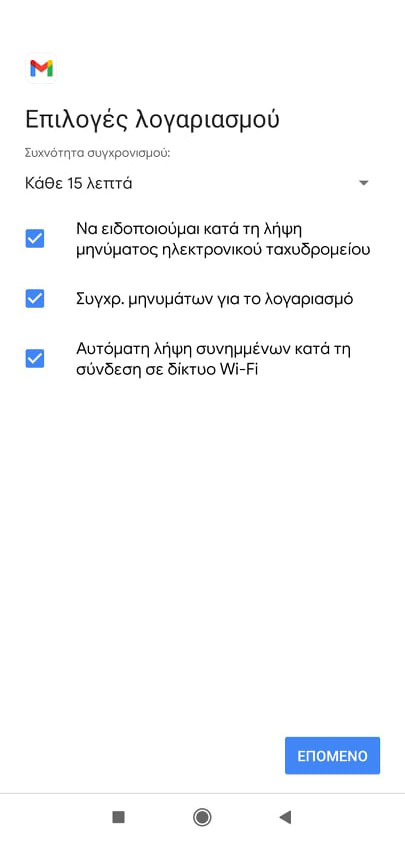
8. Make sure that all options are selected as shown in the picture below.
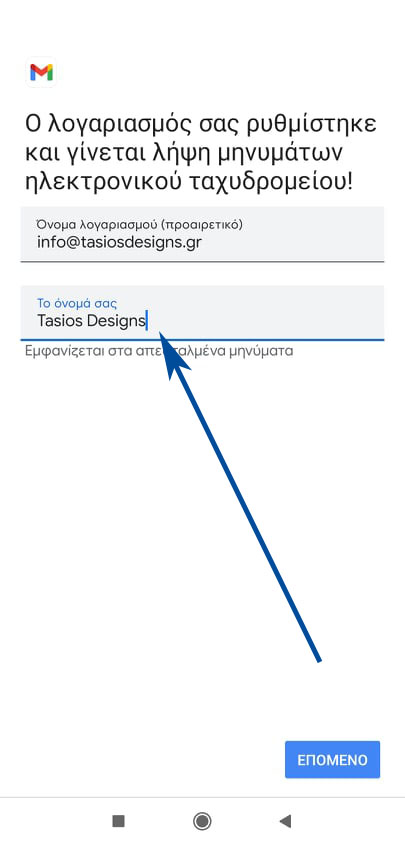
9. Finally, in the “Your name” field, enter how you want your name to be displayed to a third party who receives your message.
The installation process is complete and your email is ready to use!
At Tasios Designs we take care to create innovative and functional websites taking every parameter into consideration. In each of our creations you express the personality, the goals and the professionalism of each company, through a unique masterpiece designed exclusively for it! Contact us today, get to know us and receive a design quote for your website! Learn more